How to Check Tire Pressure Before a Road Trip
July 15th , 2026 | AstroAI *
Road Trip Preparation • Tire Pressure • Tire Care
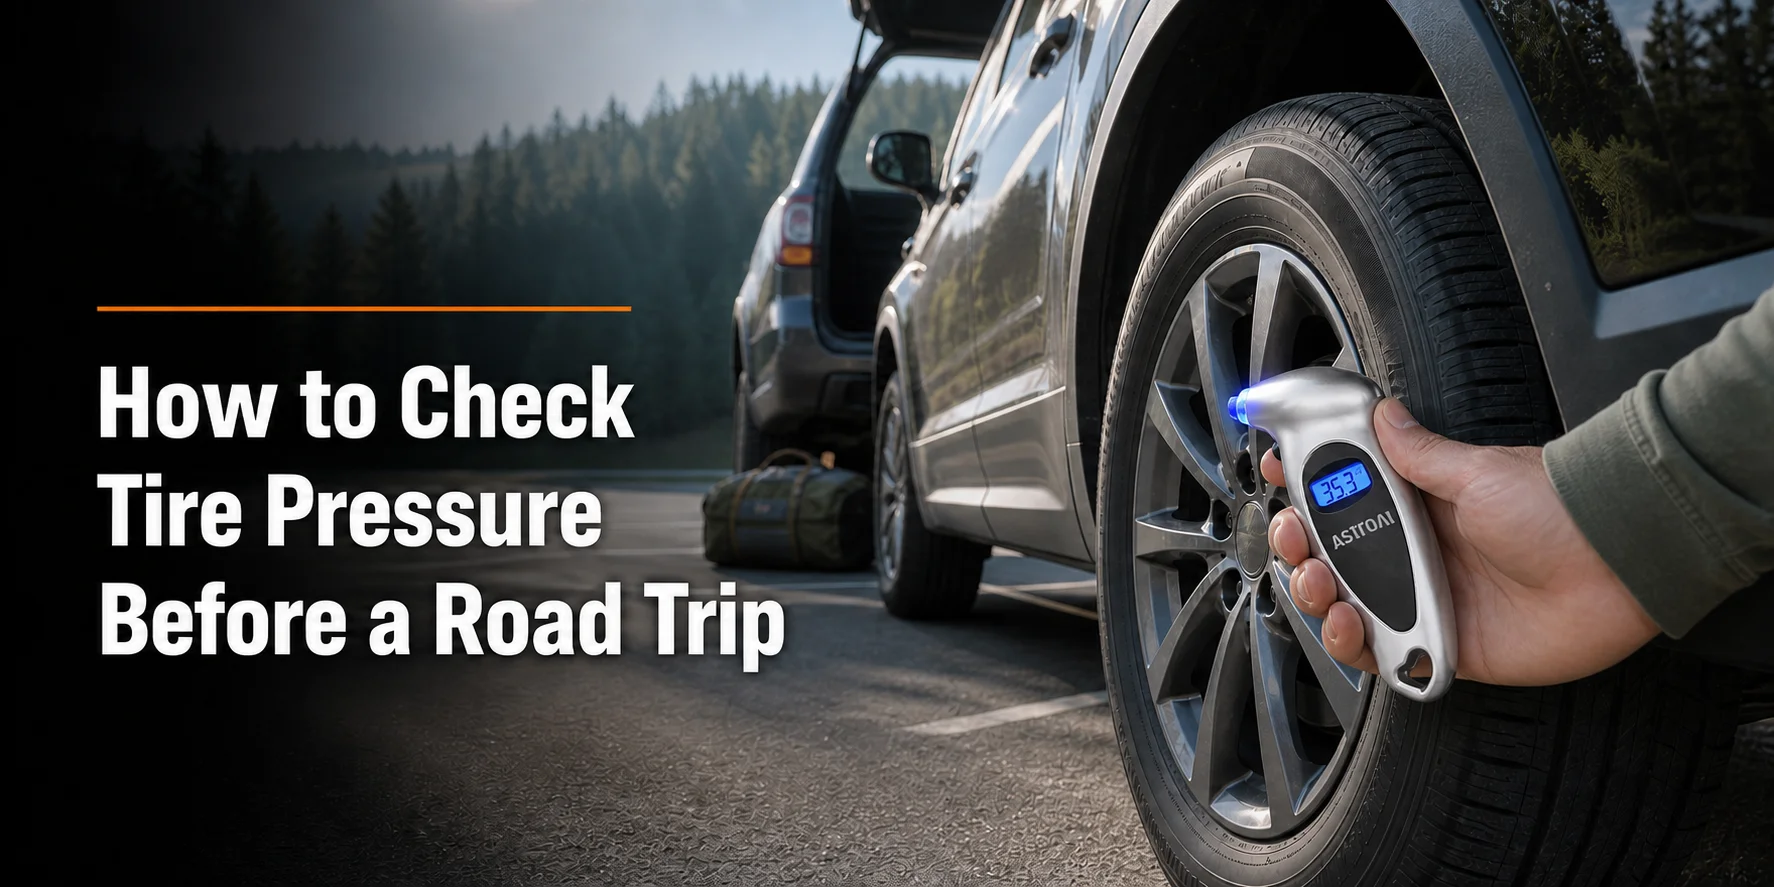
How to Check Tire Pressure Before a Road Trip
Check tire pressure before a road trip while every tire is cold, using the recommended PSI on the driver's doorjamb label or in the owner's manual. Press a reliable gauge squarely onto each valve stem, compare the reading with the vehicle specification, adjust the pressure if needed, and check again. Measure all four tires and the spare when accessible. Do not use the maximum pressure printed on the tire sidewall as the normal target.
A tire pressure gauge tells you what is happening; an inflator lets you correct a low reading. For most drivers, a compact digital gauge is the easiest primary checker, a battery-free pencil gauge is a useful glove-box backup, and a digital inflator gauge fits drivers who already use a shop or garage air compressor. A portable inflator such as the AstroAI H2 Pro becomes useful after the gauge confirms that a safely serviceable tire needs air.
Quick Answer
When: Before driving, ideally after the vehicle has been parked for at least three hours.
Target: The cold PSI on the vehicle placard or in the owner's manual, including any different front and rear values.
Tools: A tire pressure gauge for measurement and an inflator or air source if pressure is low.
Stop and inspect: Do not keep adding air to a tire with a bulge, cut, exposed cord, rapid pressure loss, or other visible damage.
Why Check Tire Pressure Before a Long Drive?
A road trip adds sustained highway speed, cargo, passengers, temperature changes, and long distances between familiar service locations. Correct pressure helps the tire carry the vehicle as its manufacturer intended. Underinflation can increase heat buildup and tire flex, while excessive pressure can reduce the tire's ability to absorb road impacts and may change handling.
NHTSA identifies tire pressure as a central part of tire maintenance and advises checking all tires, including the spare, at least once a month when they are cold. It also explains that TPMS normally warns only after a tire is significantly underinflated, so the dashboard light should not replace a manual check.
The Number That Matters
Use the pressure specified by the vehicle manufacturer. The number molded into the tire sidewall is a maximum rating associated with the tire, not the everyday cold-pressure target for your vehicle.
What You Need Before You Start
The basic check is simple, but having the right information and tools nearby prevents guesswork. Gather these items before the travel day so you are not searching for a valve cap or air source while everyone is waiting to leave.
| Item | Why You Need It | What to Confirm |
|---|---|---|
| Vehicle placard or owner's manual | Provides the correct cold PSI for the original tire and load setup. | Front and rear values may differ; the spare may have its own specification. |
| Tire pressure gauge | Measures PSI before and after adjustment. | Battery condition for digital models and a clean, undamaged nozzle. |
| Air source or portable inflator | Adds air when a tire is below the recommended pressure. | Power is available, hose reaches every tire, and connectors are packed. |
| Valve caps and a small record | Caps help keep dirt out; recorded readings reveal repeated loss. | Keep the caps together and note the date and four readings. |
How to Check Tire Pressure Before a Road Trip: 8 Steps
Plan to do this the morning of departure or after the vehicle has been parked long enough for the tires to cool. Work in a safe, level location with the parking brake applied.
1. Let the tires become cold
Check before driving or after the vehicle has been parked for at least three hours. Sun exposure can also warm one side of the vehicle, so shade is helpful when available.
2. Find the recommended PSI
Open the driver's door and read the Tire and Loading Information Label. Use the owner's manual if the label is missing or if your trip involves a load condition with separate manufacturer guidance.
3. Inspect each tire first
Look for cuts, sidewall bulges, exposed material, embedded objects, uneven wear, or a tire that appears much lower than the others. Damage needs assessment, not repeated inflation.
4. Prepare the gauge
For a digital gauge, turn it on and select PSI or the unit shown on the placard. For a pencil gauge, make sure the indicator stick is fully reset before measuring.
5. Make a firm, square seal
Remove the valve cap and press the nozzle straight onto the valve stem. A brief hiss is normal during connection; continued hissing means the seal is not complete.
6. Read and repeat if needed
Hold the gauge steady until the reading settles. If the connection leaked or the number seems inconsistent, remove the gauge, reset it if needed, and take a second reading.
7. Adjust and verify
Add air if the cold reading is below the manufacturer's target. Release small amounts if it is above the target. Pause air flow before taking the final reading, then verify with the gauge.
8. Finish all tires, including the spare
Repeat the process for every road tire and the spare when accessible. Reinstall each valve cap and note any tire that required an unusual amount of air.
Reading While Inflating
Airflow can make a gauge reading fluctuate. Stop or release the inflation trigger, allow the reading to settle, and then decide whether more air is needed. The final pressure should be verified without active airflow.
How to Interpret the Reading
The gauge number only becomes useful when you compare it with the correct vehicle specification and the condition of the tire. Use this decision table instead of treating every low reading as a simple top-off.
| What You Find | What It May Mean | Next Step |
|---|---|---|
| Matches the placard PSI | Pressure is at the vehicle's cold target. | Replace the valve cap and continue checking the other tires. |
| Below the placard PSI, no visible damage | Normal gradual loss or a temperature-related change may have occurred. | Add air to the target, recheck, and monitor the tire. |
| Same tire repeatedly loses pressure | A puncture, valve issue, wheel leak, or tire damage may be present. | Arrange a qualified tire inspection before a long drive. |
| Above the placard PSI while cold | The tire may have been overfilled or set for a different condition. | Release air in small amounts and verify against manufacturer guidance. |
| Visible damage or rapid air loss | The tire may not be safe to inflate or drive on. | Do not rely on repeated top-offs; seek roadside or tire service. |
Choose the Gauge That Fits Your Road-Trip Routine
There is no single gauge format that is ideal for every driver. The strongest setup is often a readable primary gauge plus a simple backup, with a separate inflation option available when pressure needs correction.
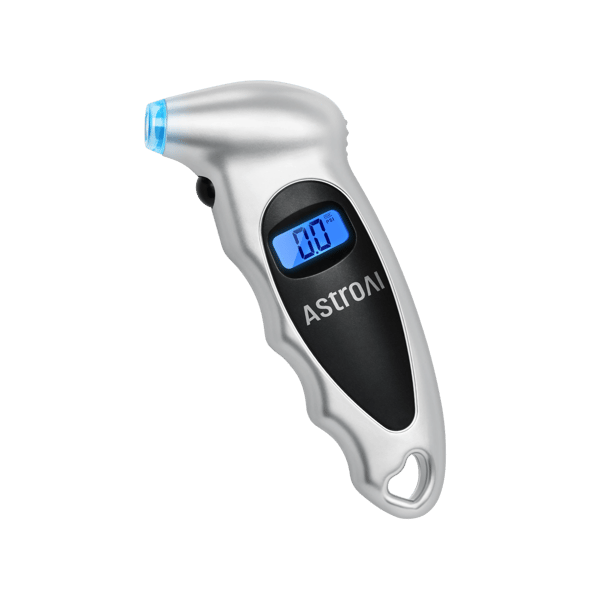
Primary recommendation for most drivers
AstroAI Digital Tire Pressure Gauge 150 PSI
Best for: Fast pre-trip checks, low-light use, and drivers who prefer a direct digital reading.
- 0-150 PSI range
- Four selectable pressure units
- Backlit LCD display
- Replaceable coin-cell batteries
- Presta valve adapter listed for bicycle use
Pros: Easy to read, compact, and useful across common car and bicycle checks.
Cons: It measures only and depends on batteries.
Skip it if: You specifically want a battery-free tool or a gauge that connects to an air compressor.
View AstroAI Digital Tire Pressure Gauge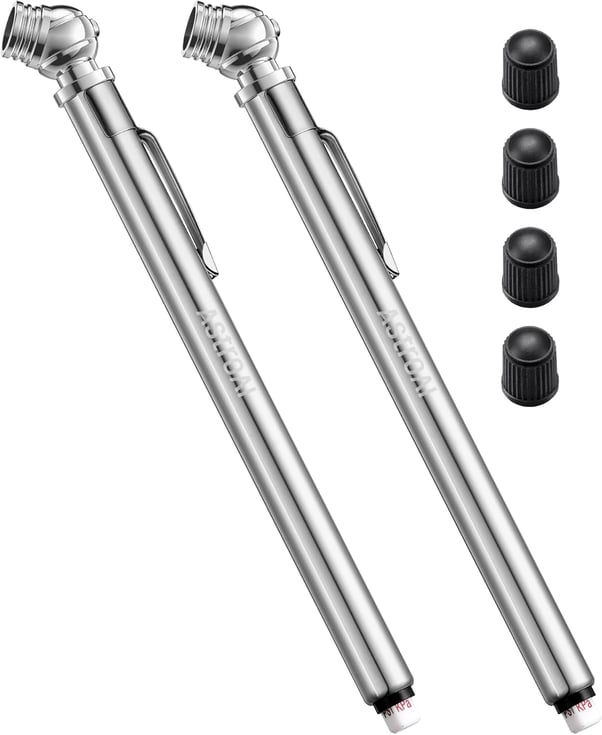
Battery-free backup
AstroAI Pencil Tire Pressure Gauge 2-Pack
Best for: Long-term glove-box storage, multiple vehicles, and drivers who want a simple backup with no battery.
- 10-75 PSI range for the linked version
- Battery-free mechanical operation
- Stainless steel, metal, and ABS construction
- Two gauges in the package
Pros: Simple, compact, and unaffected by dead batteries.
Cons: The pop-out scale can be harder to read in dim light and may require more careful viewing.
Skip it if: You want a backlit screen, selectable units, or a wider pressure range.
View AstroAI Pencil Gauge 2-Pack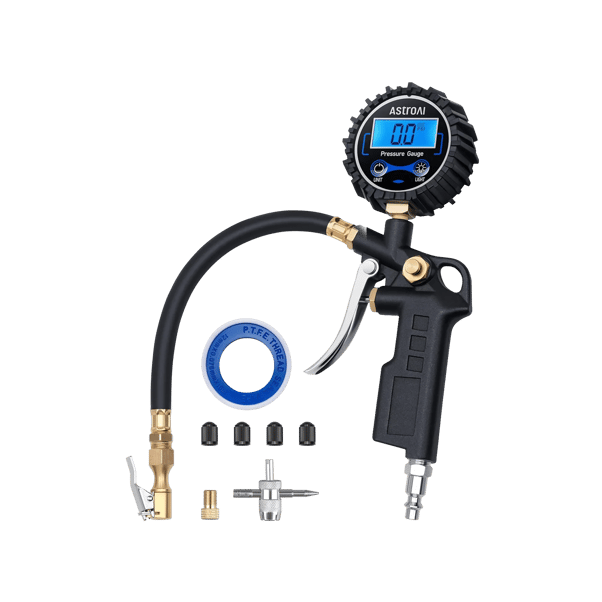
Garage air-compressor option
AstroAI Digital Tire Inflator with Pressure Gauge 250 PSI
Best for: Home garages and workshops where checking, inflating, and bleeding air from the same handheld tool is useful.
- 3-in-1 digital inflator gauge design
- 3-250 PSI listed measurement range
- PSI, bar, kPa, and kg/cm2 units
- Quick-connect coupler for an air compressor
- Powered by two AAA batteries
Pros: Combines pressure measurement, inflation control, and air release in one tool.
Cons: It is designed to work with an external air compressor; it is not a self-powered portable pump.
Skip it if: You only need a small gauge for roadside or glove-box checks.
View AstroAI 250 PSI Inflator Gauge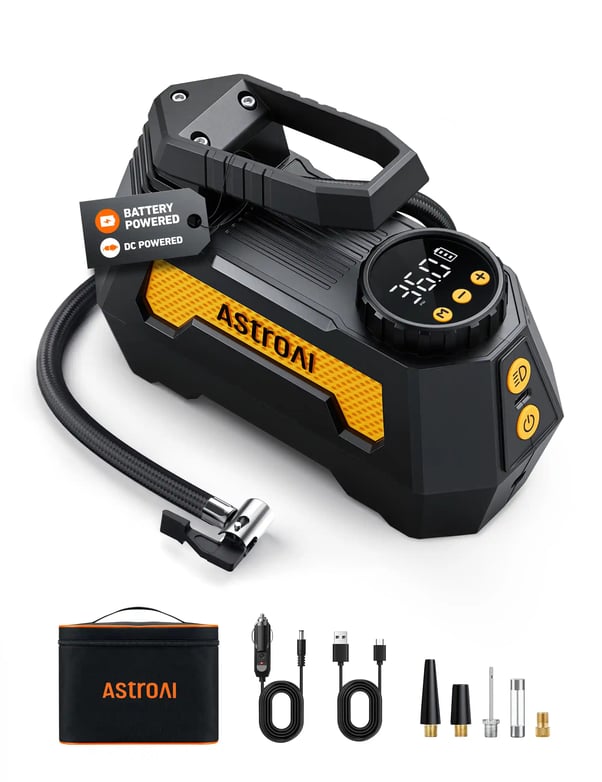
Companion tool for adding air
AstroAI H2 Pro Tire Inflator
Best for: Drivers who want a portable way to correct low tire pressure at home or during a trip after checking the tire.
- DC 12V and battery dual-power operation
- Auto shut-off at a preset target
- Designed for cars, motorcycles, bicycles, and balls
- Portable format for vehicle storage
Pros: Adds air without requiring a garage compressor and offers two power options.
Cons: It does not diagnose leaks, repair punctures, or make a visibly damaged tire safe.
Skip it if: You only need pressure measurement and already have a suitable air source.
View AstroAI H2 ProDigital vs. Pencil vs. Inflator Gauge
| Tool | Best Place to Keep It | Main Advantage | Main Limitation |
|---|---|---|---|
| Digital 150 PSI gauge | Glove box, console, or home tool drawer | Clear display and selectable units | Needs working batteries and does not add air |
| Pencil gauge | Every vehicle as a backup | Battery-free and compact | Scale is less convenient to read in low light |
| Digital inflator gauge | Garage or workshop with an air compressor | Measures, inflates, and releases air | Not a self-contained roadside pump |
| Portable inflator | Trunk or road-trip emergency kit | Corrects a low reading away from a shop | Cannot repair tire damage or explain repeated pressure loss |
What If the TPMS Light Comes On During the Trip?
Treat the warning as a prompt to inspect and measure, not as permission to keep driving until the tire looks flat. Reduce speed, avoid abrupt steering or braking, and move to a safe place away from traffic. Then look for obvious damage and check each tire with a gauge.
- Stop safely. Choose a level location away from moving traffic whenever possible.
- Inspect before inflating. A cut, bulge, exposed cord, strong vibration, or rapid loss requires service.
- Measure all tires. The lowest-looking tire is not always the only one below specification.
- Add air only when appropriate. Use the vehicle specification and recheck after airflow stops.
- Monitor the result. If the warning returns or pressure drops again, arrange tire inspection rather than repeatedly topping off.
Warm-Tire Limitation
Pressure normally rises as a tire warms during driving. Do not release air from a warm tire merely to force it down to the cold placard number. If you must make an emergency adjustment during travel, follow vehicle guidance and recheck every tire cold before the next long driving segment.
A Practical Road-Trip Tire Check Schedule
| When | What to Do | Why |
|---|---|---|
| Several days before departure | Inspect tread, sidewalls, valve stems, and the spare; arrange service for damage or repeated loss. | Leaves time for repair instead of discovering a problem on departure morning. |
| Morning of departure | Measure and adjust all tires while cold according to vehicle guidance. | Establishes a reliable baseline before highway driving. |
| At each travel-day start | Walk around the vehicle and look for a visibly low tire or new damage. | Catches obvious changes after overnight parking. |
| After a pothole, curb strike, or TPMS warning | Stop safely, inspect, and measure the affected tire and the rest of the set. | Impact or sudden pressure change may create a new safety issue. |
Common Tire-Pressure Mistakes Before a Road Trip
- Using the tire sidewall maximum as the target. The vehicle placard or owner's manual is the correct reference.
- Checking immediately after highway driving. Warm tires can read higher than the cold baseline.
- Checking only the tire that looks low. Pressure loss may affect more than one tire, and visual inspection alone is unreliable.
- Forgetting the spare. A spare that cannot carry its required pressure may not help when needed.
- Allowing air to leak around the gauge. Reposition the nozzle squarely and repeat the measurement.
- Reading while air is flowing. Pause inflation and let the display settle before making the final decision.
- Repeatedly topping off the same tire. Recurring loss needs diagnosis before a long drive.
- Assuming TPMS confirms exact PSI. The system is a warning aid, not a replacement for a gauge.
Final Pre-Departure Checklist
- 01. Confirm the recommended front, rear, and spare-tire pressures.
- 02. Check every tire cold with a gauge that seals correctly.
- 03. Inspect tread, sidewalls, valve stems, and visible wheel areas.
- 04. Adjust pressure and verify again after airflow stops.
- 05. Pack the gauge, valve adapters, charging cable or 12V cord, and inflator if carried.
- 06. Arrange service for any tire with damage, vibration, or repeated pressure loss.
Bottom Line
The most useful pre-trip routine is measurement first, correction second. Start with the manufacturer's cold-pressure specification, inspect every tire, use a gauge with a firm seal, and verify the reading after any adjustment. A digital gauge is the easiest primary choice for many drivers; a pencil gauge is a dependable battery-free backup; and a digital inflator gauge makes sense in a garage with an air compressor.
If the check reveals low pressure and the tire has no visible damage or rapid loss, a portable inflator such as the AstroAI H2 Pro can help restore the target pressure before departure. If pressure falls again, the correct next tool is not more air - it is a qualified tire inspection.
Frequently Asked Questions
When should I check tire pressure before a road trip?
Check before driving, ideally after the vehicle has been parked for at least three hours. This produces a cold reading that can be compared directly with the vehicle placard or owner's manual.
Where do I find the correct PSI for my car?
Use the Tire and Loading Information Label on the driver's doorjamb or the owner's manual. Do not use the maximum PSI molded into the tire sidewall as the normal operating target.
Should I check all four tires and the spare?
Yes. Check all road tires and the spare when it is accessible. Front and rear tires may have different recommended pressures, and a spare often has its own specification.
Can I rely on TPMS instead of a tire pressure gauge?
No. TPMS is a warning system, and NHTSA notes that it generally activates only when a tire is significantly underinflated. A manual gauge provides the actual reading needed for routine checks.
Is a digital tire pressure gauge better than a pencil gauge?
A digital gauge is usually easier to read and more convenient in low light. A pencil gauge is better as a compact, battery-free backup. Many road-trip kits benefit from having one of each.
What should I do if tire pressure is low but there is no visible damage?
Add air to the vehicle manufacturer's cold-pressure target, verify the reading after airflow stops, and monitor the tire. If pressure drops again, arrange an inspection before continuing a long trip.
Can I check tire pressure after driving?
You can inspect and measure a tire during travel, but a warm reading is not the same as the cold baseline. Do not bleed a warm tire down to the cold placard number; recheck cold before the next long drive.
Does the AstroAI 250 PSI inflator gauge work without an air compressor?
It can display pressure with its batteries, but its inflation function requires connection to a compatible external air compressor through the quick-connect fitting. It is not a self-contained portable air pump.
How often should I check tire pressure after the trip?
Continue checking every tire, including the spare, at least once a month when cold. Check sooner after a major temperature change, a pothole or curb impact, a TPMS warning, or any sign of pressure loss.